
Window to Wall 6
 GreenBoard!
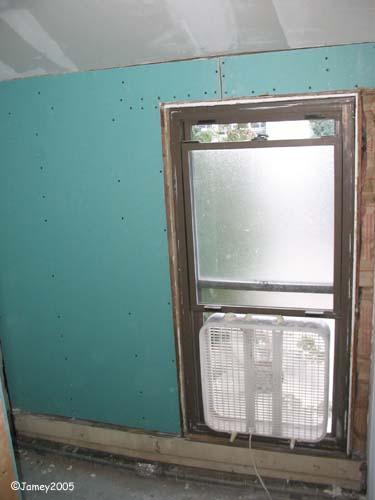
This is the step where the window really became a wall. With the studs behind it to screw to and the insulation in place...it was time to hang the sheetrock. In this case I used, “WaterCheck” or “GreenBoard” which is drywall made for use in bathrooms or other wet areas.
When I did my first bathroom on my own several years ago while still working for Dan (The Home Depot Installer that taught me everything about home repair) I did a lot of reading about where to use and not use GreenBoard. One of the main things I remember is that you should apparently not use it on ceilings because it slips off the screws eventually. I don’t remember exactly what it said on the manufacturers website...but the gist I came away with is that you don’t use it on the ceiling and when you use it on a bathroom wall you put in about twice as many screws as you think you should to hold it in place. I actually added a whole bunch of screws to the vertical sections after I took this picture going for about a four inch gap between screws anywhere I had something to screw into.
One thing I tried to do with the drywall was make sure I spanned the corner at the top of the window as much as I could with the main sheet as this tends to be an area where houses crack down the road and I wanted to give it as little opportunity to crack there as possible. I chose to put my gap on the next stud over so that I could screw both sheets of wallboard to the stud where they meet.
posted by Jamey @ 3:08 PM
![]()
0 Comments:
Post a Comment
<< Home