09 February 2008

Today: Carpet.

I have a cousin whose not-boyfriend is a carpet installer. The kid is pretty amazing...for her last apartment he sewed together a ton of remnants into a really cool runner carpet that snaked it's way through her whole apartment. He's a bright kid that went into the family business.
Last time I was out in California he said 2 things about carpet guys that have stuck with me and in all the years I've been doing home repair he's never once been proven wrong.
"Carpet is the EASIEST thing to do in home-improvement"
"Carpet guys are the dumbest ones in the home improvement business."

I won't go into how bad the carpet guys just screwed up at my friends house...ok, I will. They came out twice to measure her living room. They saw exactly what they were dealing with both times as far as the subfloor and the transition to the kitchen tile. Neither time did they mention a hint of any possible problems. Then they came out to put in the carpet. After they finished laying the carpet in the living room they said the subfloor and tile were too uneven for a transition strip and that they couldn't just do a clean edge because the tile guy (no, not me on that one) didn't leave them anything resembling a flat, straight edge to work with. They also showed up with a wooden transition strip but didn't install it saying, "We can't do a transition strip between carpet and tile." uh...ok...why did ya bring one with you then?
Why? Why did the guy who came out twice to measure then bring a transition strip he would later say he couldn't use where he brought it to go?
Why didn't he say something about the subfloor/tile/transition strip either of the 2 times he came out to measure the room?
Why wait until the carpet's down to say there's a problem with the subfloor?
Stupid stupid stupid!
I dunno the end result, or even if there is one yet...last time I was there he was calling and arguing with them. I didn't hear the response he got, but mostly he kept asking why they didn't tell them there'd be a problem when they could have easily fixed it, rather than waiting til the carpet was down.
And I don't know what the hell they were thinking with the strip of tackless that they put along the whole open side of the room (about 15 feet, where the transition strip to the tile shoulda gone)...but if you're barefoot you can feel the nails when you walk across it into the living room!!!
Is it just me? Or would common sense dictate using tacks in stead of tackless where people are going to be walking across it? You know...like most carpets are done at a doorway. Or they could have told them to put down a metal carpet tack edge before the tile went in so that dumbass would have had a straight line to work with and they would have solved all their problems before they were created.
In stead...they are now having the carpet pulled up so that the tile guy can come back to remove and replace all the tile along the edge of the room (removing and replacing individual tiles is WAY WAY harder than replacing a whole room and he's gotta do a load of 'em) and then they're going to re-lay the carpet. Last I heard was, the carpet place isn't charging them to come re-lay the carpet....so nice of them!

Ok...so the real reason I started writing about carpet was to talk about Stretching.
No, not the bendy over owie kind.
The kind that, if it's not done, voids the warranty on your carpet.
Apparently some new carpet doesn't need to be stretched, or so said the installer/salesman...BUT...

Before I ever installed my first carpet...I read the directions. For about a week I searched out everything I could find online, in stores and in the home repair books I have (and a few that friends have). I talked to a couple of installers. I watched at least a dozen carpet installation videos.
You know...I did my research.
Well...everything said you have to stretch a carpet when you put it in.
I've seen what happens when it's not done...those ripples (perverts!) and bulges that appear over time.
I've seen it time and time again.
And again.
At best I'd say carpet installers do the required stretching about 50% of the time (and that's being nice...I'm really thinking they don't do it 75-90% of the time)
I've never seen one do it in-person...and I've watched a lot of carpet go in. Even when I hired them here before i was a DIYer they didn't stretch anything and I've had to go back and re-cut carpets and put them in properly because they absolutely SUCKED!

So...What I'm saying here is....
If you have carpet put in you need to be there when it goes in.
And you need to make sure they stretch it.
Not talkin the knee-kicker here....s t r e t c h e r .


Make sure they walk in carrying one of these...


And that they are doing This:

22 November 2006

Another Project Finished! :)

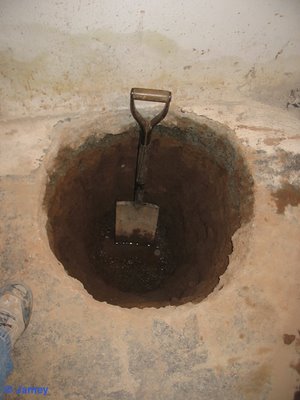
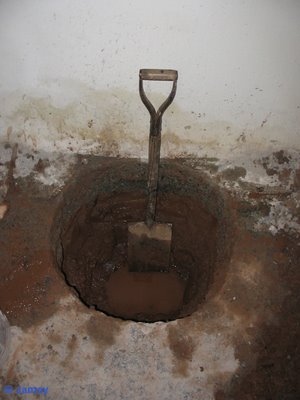
Well, similar to where I left off last time, but the shovel is almost all the way in the hole this time. That's as deep as I need to go.


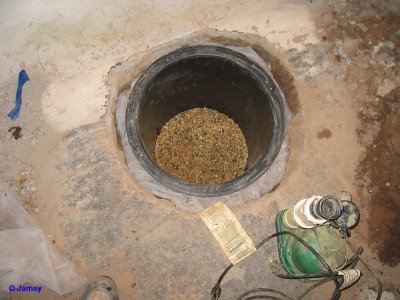
First I lined the hole with drainage fabric.
Then I filled in with about 6" of gravel at the bottom of the hole.


After cutting most of the bottom off the sump basin, I put it in the hole and added a few more inches of gravel to hold it down. I then filled in the sides of the hole with gravel and when I got about 4" from the top I folded the drainage fabric over the top of the gravel.


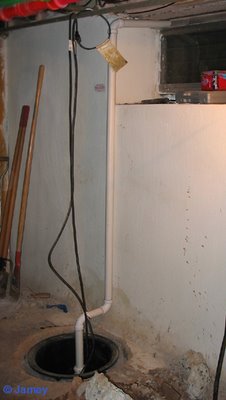
Next was putting the pump down in the hole and hooking up the 2" pvc drain lines to it.


The final step for today was filling in the top of the hole with concrete and putting the lid on the basin.


Good timing to finish it up, there's a NorEaster hitting pretty hard at the moment...supposed to get an inch of rain tonight! I will keep checking and see if I'm getting any water in the basin. Can't wait to get to see it working!

If it doesn't rain enough to make it pump tonight, I'll test it by filling the hole with water myself tomorrow. I didn't want to take a chance with the wet concrete tonight.

18 November 2006

The Beginning of the End of the Never Ending Waterproofing Project

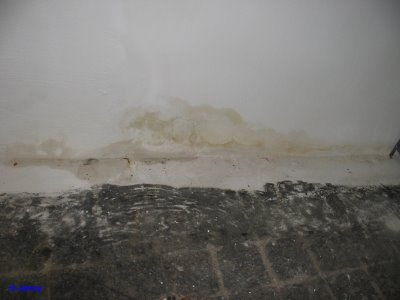
Over the past 7 1/2 years I've done a lot of work repairing and waterproofing my basement. I fixed the cracks in the foundation and painted the walls with waterproofer on the inside and filled the cracks around the foundation on the outside.

Unfortunately, as you can see, I was still getting some water though the wall and floor.


So my next step is installing a sump pump relieve the hydrostatic pressure.
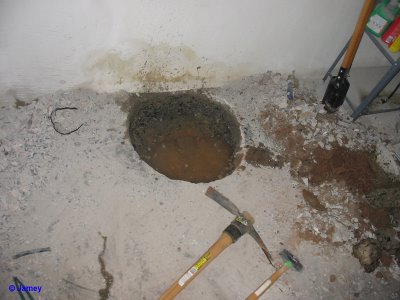
First that means making a hole in the floor to put the 'sump' liner into. I used an air-chisel to make a hole and dig out the dirt under the concrete. I drilled around the edge of the hole with a masonry bit and then used the air-chisel to cut a channel around the edge of the hole. I used a cold chisel and a sledge hammer to go the last couple of inches.


I used the sledge to break out the remaining concrete.

Some pretty big chunks. The concrete is about 7 inches thick.

This is as far as I got before my back told me to finally call it a day.

Tomorrow I'll dig the last foot of the hole and put in the liner, stone, and pump.

07 October 2006

First Coat of Polyurethane

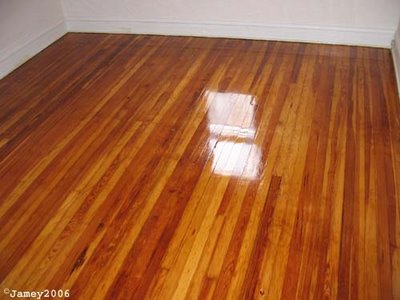
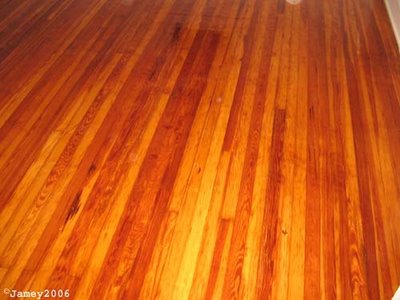
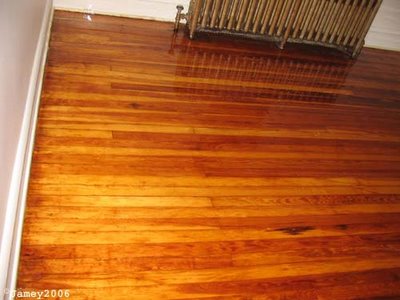
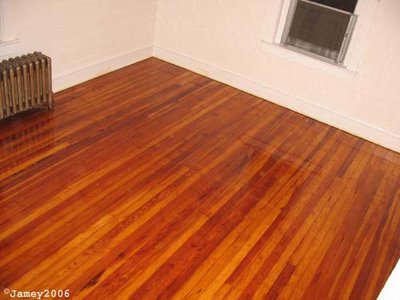
Here are a few shots of the floor I just took. It dried pretty well overnight.

This one is with the flash

Same shot with just the natural light from the windows, no flash.

Also just the natural light...Looking in the door to the room.

It amazes me how well the polyurethane levels out and soaks in as it dries. It really seemed like the waxer was putting it on a little thick when I was applying it...But looking at it this morning it seems to be smooth and level with no puddles.

So the next step is to lightly sand this coat. When I did the living room floor I used the floor machine with a 100 grit screen for the poly sanding. Since I learn as I go along, this time I'll be using a 120 grit (or maybe even a 150) when I sand and I'll be doing it with my drywall pole sander (sanding by hand, not machine). The in-between poly sanding isn't like the previous floor sandings where I was removing the old finish and smoothing the floor, this one is just to help the next layer of polyurethane adhere to the one that's already on. So the hand sanding is better because it won't remove as much material as using the machine would. It will also make any sanding marks with the grain of the wood in stead of the swirls the big machine makes.

When I did the first floor, I actually broke the borrowed floor machine trying to sand the poly in-between coats (the plastic part that holds the screen on the machine cracked...Probably because the screen was sticking so much to the fresh poly). So this time I'll hand sand. Live and learn.

06 October 2006

WoW!!!!!!!!!!!!!!

After some debate today with a friend of mine with a MUCH better sense of design than I have...I decided to not stain this floor and to just go ahead with the polyurethane.
I shot these pix about 5 minutes after I finished.
Unlike most of the other pix, these are being taken at night (like 10 minutes ago) so the color is completely based on the flash.


Applying the polyurethane is pretty simple. You use something called a 'Waxer"
It's a wooden clamp thing that goes on the end of a broom handle that holds a lambs wool pad that you dip in the poly and 'paint' onto the floor.

04 October 2006

To Sand or not to Sand

I just finished up the first hand-sanding using a sanding screen and my drywall pole sander. This sanding is 120 grit. I also did a little with my hand held drywall sander where I wanted to use more pressure and work smaller areas than I can do with the pole sander.
At this point I'm debating how far I will actually go with the sanding. The last floor I did I never went over 100 grit. The bulletin boards on the minwax site recommend going up to 180 grit with the sanding. I don't think going any higher with the grits will help as far as any of the swirls from the big sander or with any of the other marks on the floor at this point...And as far as the overall look of the finish goes, I think the last floor I did where I stopped at the 100 grit and did no hand sanding, looks really good. I don't see it getting any better if I go up 2 more grits. And the 120 sanding was done by hand with the grain of the wood to smooth out any marks left from the machine sanding. 150 grit sanding wont remove marks left by the 20 grit sanding...Each subsequent grit will only remove the marks left by the previous grit. So any swirl marks left on the floor at this point would require back-tracking a few grits and working my way back up in that area.


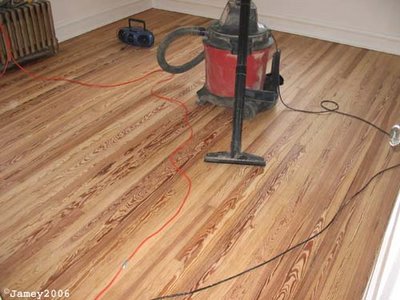
I did an extra-good shop-vac job before I took these pix. Before I stain or poly I'm going to have to do the super-extra-good shop-vacing including vacuuming all of the walls in the room because they are completely covered with a thin layer of dust.
But...Here's the floor as it looks right now.


So at some point I need to figure out where the mentor's statement, "Enough is enough and enough is too much" comes into play and I should just move on to the stain. The house is almost 100 years old, the last sand and re-finish job was done poorly (there are major divots around the edges of the room from the last guy not doing a good job with a drum sander). So at some point I need to decide it's not going to get any better than it is now if I keep going and just move on to the next step. The anal retentive perfectionist in me has a hard time with this.

Help.

Helpers do a much better job when you show them how to do something rather than just tell them what to do.

28 September 2006

Philosophy

When you are doing a job...especially if it's a re-doing...

It doesn't matter who made the mistake.
If the mistake is there when you are finished...
It's your mistake, you own it.