28 September 2006

Philosophy

When you are doing a job...especially if it's a re-doing...

It doesn't matter who made the mistake.
If the mistake is there when you are finished...
It's your mistake, you own it.

27 September 2006

No More Machine, Time to go Old School

I just finished up with the 100 grit sanding using my floor machine.
This is the last one I'll be able to do with the machine as they don't sell any higher grits for it. Well, at least not at the tool rental at the big box stores, I haven't checked the local flooring supplier yet, since they aren't quite so local...But I plan to get over there in the semi-near future.

So the rest of the sanding grits; 120, 150, and 180 will all have to be done using my drywall pole sander and sanding screens. I'll probably also go at least up to 120 with my random orbit palm sander (5") on the edges and anywhere I can still see any scratch marks left from the big sander, although I did work most of them out with the last piece of 100 grit using the random orbit sander before I did the final 100 grit with the big machine.


22 September 2006

This is probably the worst spot on the whole floor. I'm chipping out some of the splitting wood and sanding the rest down smooth.
Stuff like this adds character to the floor.


I believe this is after one of the 36 grit sandings...Might be the 60 grit.
I'm slowly working my way up through the grits. I did several passes with the 36, 3 passes with the 60 and two passes with the 80 grit so far.

This is all vacuumed up after the 80 grit sanding.
I also did the edges of the room with my belt sander with 80 grit until I broke the sander (got an extension cord stuck in it) and then my 5" random orbit palm sander with 100 grit paper on it (my last piece with the roughest grit I have for it).

The 80 grit is the highest I got at Home Depot for my big sander...Was the highest they had at the one I was at. I checked on my fotolog and saw that I went up to 100 grit with the machine last time. I found 100 grit screen at the Home Depot I went to last night (a different one) so I'll be doing one more sanding with the big machine this weekend (well, 2 more...I'll do 2 complete passes with it).

Unfortunately I did some reading on the Minwax message boards...And I need to go up to 180 grit (do 120 and 150 grit first) before I start to stain and poly. It also said I have to use my drywall pole sander with sanding screens for the higher grits and not the machine to minimize swirls on the floor. I'm going to do it this time because when I did my living room floor 2 years ago I got a lot of swirls in the finished product...The stain and poly really brought them out. Most people say they don't notice them...But when I look at the floor they are pretty much all I see.

The palm sander is doing a great job on the edges for me and also on any low spots in the room that still have remnants of the old finish on them still.

I know it's taking me a long time to do this floor...And I have a long way to go. But I want to do this one as best I can, the perfectionist in me wants to see just how good I can do it...How good the final result can be. If it takes me too too long...I may just put carpet in the other bedrooms, it's much faster. And that way at least a potential buyer will see just how good they can look. Who knows though, I do have a lot more of the sanding stuff for the machine....So maybe in a month when I move stuff back into this room I'll go ahead and start on the next one.

19 September 2006

Big Bolt Blues

Well...I tried doubling up the blue pads...Didn't work, it didn't spin and they pulled right off the bottom of the machine.
So last night I cut out and glued another piece of 1/4" plywood onto the bottom of the Pad Driver.
So far so good today...I got 2 more rounds of sanding done on the whole room, both with the 36 grit sandpaper.
Next step is to move on to a higher grit...Which also means I'll be going from sandpaper to those mesh screens that cost twice as much as the sandpaper (6 times as much in this case because I got the sandpaper on clearance for $2 a piece).

I'm working it very meticulously so as to not leave any 'swirls' from the sander in the floor. I learned from the first floor I did that even the slightest marks left from the sanding will be made really obvious by the stain and polyurethane. But, as I learned when I took my first metalworking class in college...The first sanding is to get everything smooth and the sanding with subsequent grits is to remove the marks left by the previous sanding. So today's sanding with 36 grit sandpaper is mostly just to get out the marks that the 20 grit sanding left on the floor.
I think the next grit (the first screen) is a 60. I don't remember how high I go before I stain and poly, it's been a couple of years since I did the last floor. So I'll read the directions on the cans (of stain and poly) after I do the next grit.

18 September 2006

Sanding

With the water heater situation resolved I'm back to work re-finishing the floor.

A couple of stumbling blocks with the sander...The bolt I'm using to hold the pads and sandpaper on kept coming un-done because of the rotation of the sander. I tried for a couple of days to find a 'Left-Hand' threaded nut and bolt (one where the threads are reversed so it would tighten in stead of loosen as the sander spins) but was unable to find one. So I came up with my own solution, I drilled a small hole in the bolt and put a cotter pin through it and it's been holding the nut on perfectly. Unfortunately, the next little roadblock happened as I used the machine and the blue pad began to squish down some...As it did the end of the bolt began to come into contact with the floor - not good! So I ground it down a little with my dremel tool and put on a new pad. When I go to the next sandpaper grit I'm going to try doubling up the blue pads under the sandpaper to see if that adds enough height to solve the problem. My next step, if that doesn't work, will be cutting the bolt shorter and drilling a new cotter pin hole but I hope it doesn't come to that as it will make it a lot more difficult to screw on the nut.

But...As you can see here, I have been making some good progress on the floor even with all the problems.


The most difficult part of the sanding so far has been the removal of the old finish. Not sure exactly what it is, I'm assuming some type of varnish. The sander scrapes it off pretty well but it keeps making huge sticky chunks both on the sandpaper and on the floor. When the chunks get thick on the sandpaper it stops spinning as they 'glue' it down to the floor. I have to constantly stop the machine, flip it over and pick the chunks off because they also get so thick the sandpaper is riding on them and not contacting the floor.

These are the chunks when they stick to the floor:

And here they are after I chip them off of the sandpaper:

Overall though...I think it's going pretty well and I'm learning enough in the process that I think the subsequent floors (I have (at least) 4 more rooms to go after this one) will go a lot more smoothly (and faster).

16 September 2006

The Rest of the Story

Ok...So to review...
To get the old water heater out I had to cut the in and out water lines.


Once I put the pipe dope on the threads on top of the heater I put the connectors I made on. I made sure I cranked them down good and tight because once I made the solder connections there would be no more turning of the connectors.

One thing I thought was kinda weird...Was that I had to prop the new water heater up on bricks so it wouldn't be sitting on the basement floor. The old ones both have 'feet' on the bottom.

So here are the water lines all connected up. So now you can see that if I had done it all in-place, not only would the bottom joint have been really close to the heater and could have caused problems, but the next joint up would have had to have been soldered upside-down...Not impossible, but why make things harder when you don't have to?

So once the water lines were all together, I re-connected the gas line...Turned everything back on...And fired it up.

Half an hour after connecting it and turning it on I was enjoying a nice hot shower :)

Overall, not a bad little project. Nothing was very hard about it...And I got to play with my torch.

15 September 2006

It Never Ends

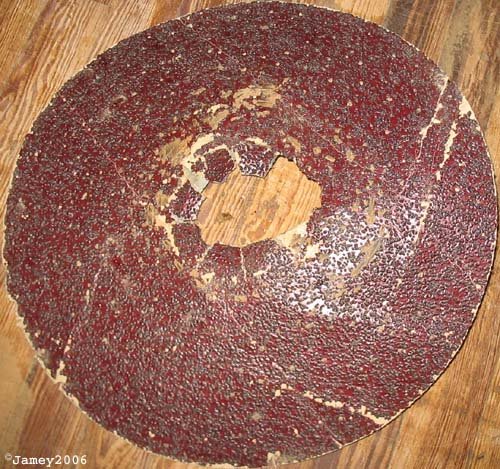
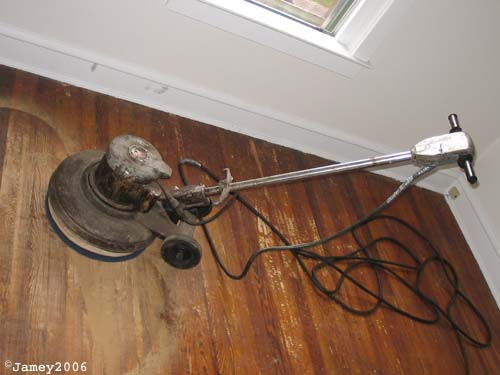
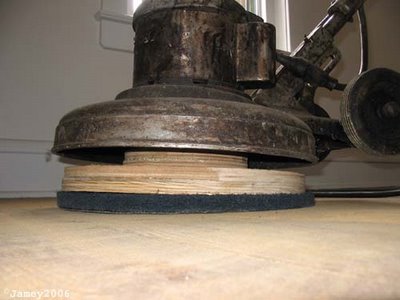
So while I was busying myself sanding the bedroom floor...My water heater decided to spring a leak. It wasn't raining out so I knew something was wrong when I went down and the basement floor was all wet.
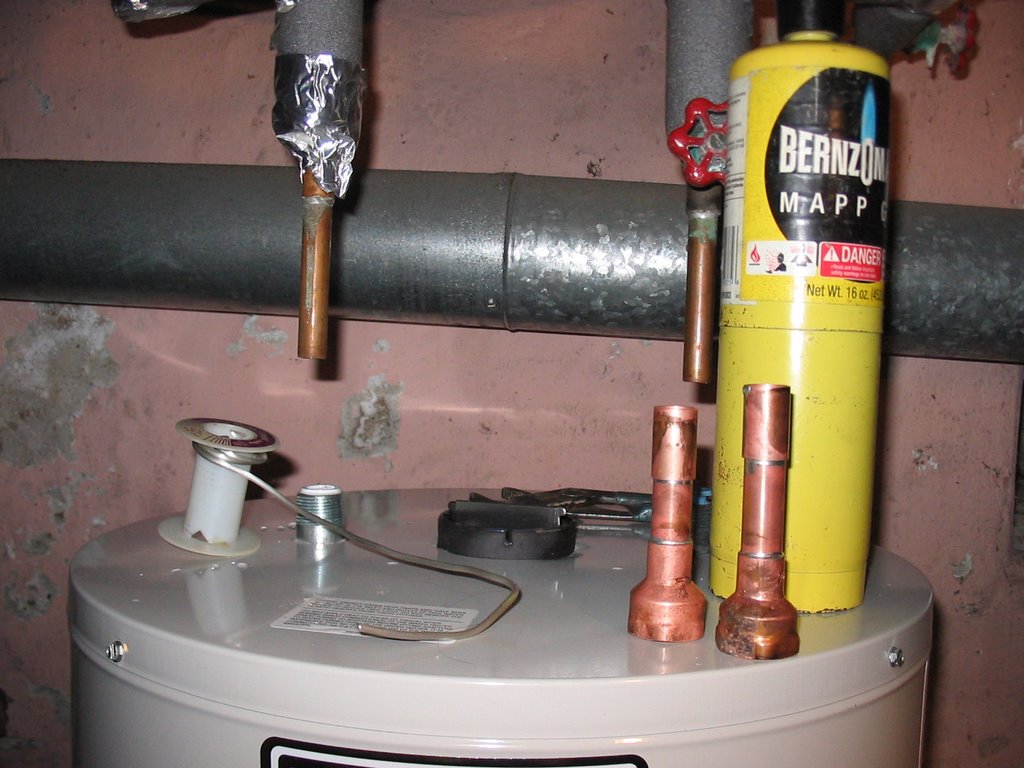
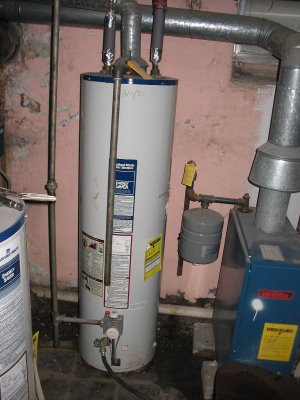
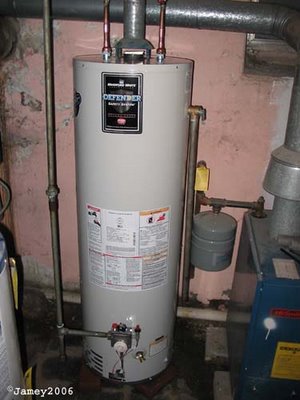
This first picture is the 14 year old leaking water heater.
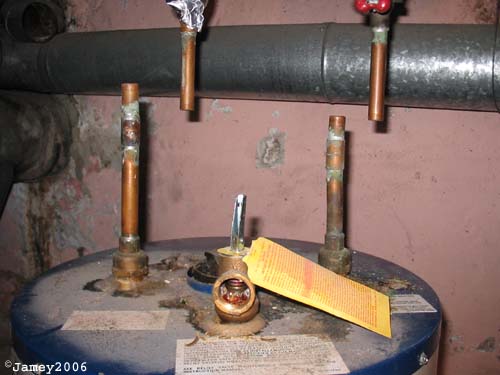
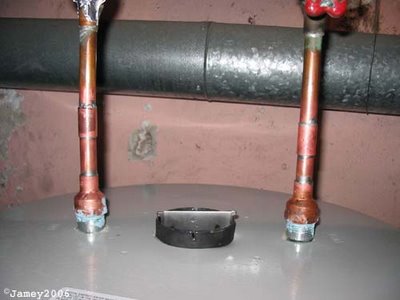
One thing to notice here is that the last plumber installed the tube for the pressure releif valve to spray down right onto the controls for the water heater. Putting aside for the moment that the directions explicitly say DON'T do this...Wouldn't you think common sense would have to kick in somewhere and just by looking at it indicate that this is a BAD idea?
And can someone tell me why they put that insulation pipe-wrap stuff on the cold water inlet lines?


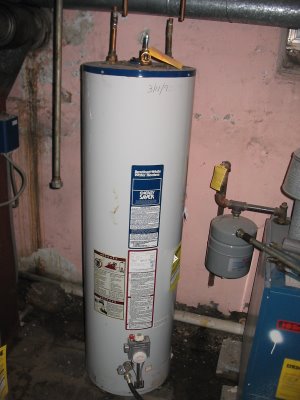
Step one in replacing it was turning off the gas...Had to do this at the meter as the valve to this heater is missing the handle so I couldn't turn it all the way off (such a joy this house is).
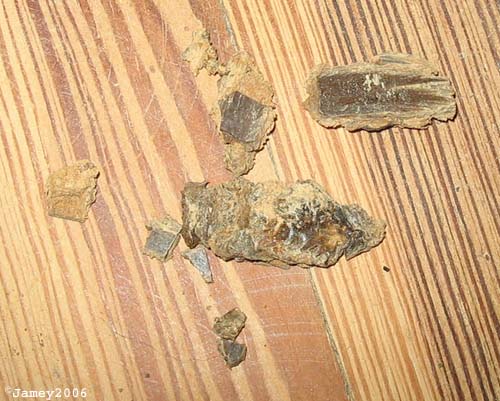
Once the gas was off I shut the water supply and hooked up a hose to the drain on the tank and let the water drain out into my sump-pump hole. With the tank drained I disconnected the gas line and cut the water lines attached to the tank. With the tank empty and everything disconnected I could then remove the tank.


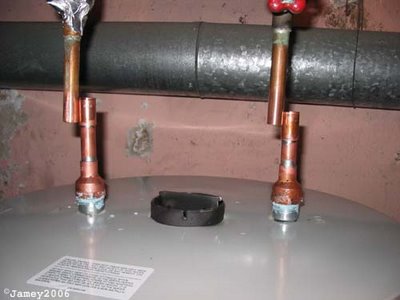
Then I got the new tank in place and soldered together the new connectors.


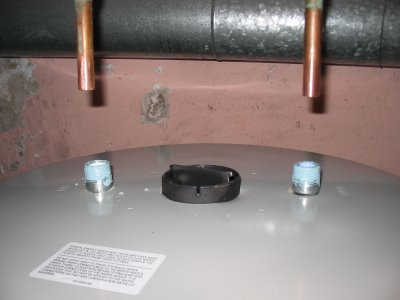
A closer look at the connectors for the water line. I did most of the soldering beforehand leaving only one connection that would need to be soldered with the lines in-place. As you can see on the connectors, if I had done it in-place, one of the solder joints would have had to be done with the solder flowing up. Although not impossible, it is a little more difficult to get solder to flow against gravity. So it was much easier to pre-solder the parts together leaving only one connection to be soldered in place where the solder would be flowing down into the joint.


Since the connections to the water lines screw onto the top of the tank I put a good amount of 'pipe-dope' on the threads atop the tank to make sure the connections don't leak. Some people use 'Teflon-tape' for this, I was taught the 'pipe-dope' method. I guess it's just a personal preference. But the guy that taught me was rather adamant about it...The first thing he does when he opens the box to a new plumbing fixture is throw the Teflon-tape in the trash.

Since I can only add 5 pictures at a time, this is all you'll get for now. Next update will have the rest of the insallation process.

14 September 2006

Pad Driver

Starting with the well used piece of 20 grit sandpaper...


Then the 'Pad Driver' I made for my floor machine...


And...all together now...

Overall it's been working pretty well. After some initial tweaking of the bolt that holds everything together (had to drill a hole in it and put a cotter pin through it because the machines rotation kept loosening the bolt, and then I had to grind the end of the bolt down a little because it started touching the floor), the main problem I am running into is the 'varnish' I'm sanding off turning into lumps of goo making the sandpaper stick to the floor...it stops it from spinning and sometimes even rips it off the bottom of the machine.

13 September 2006

Here are a couple more pix I couldn't get to post the other day.
Here's the floor machine doing it's thing.


So far it's working pretty well...I have over half of the floor sanded through the first grit (20)

Two stumbling blocks I have run into:
First...I needed a left hand (reversed) thread nut and bolt to hold the pad on so it won't loosen up as it spins. Couldn't find one anywhere so I drilled a hole in the bolt I used and put a small cotter pin in it...problem solved.
Unfortunately at this point I'm running into the problem of the bolt I used being too long and touching the floor. I'm going to try grinding a little of the end off and see if that works for me. My other option is adding a second blue pad to see if I can increase the height a little...I have another pad to try that with but I think it would cause more problems than it would solve. Another option is to add another layer of plywood (probably 1/4" Luann to the bottom of the pad holder I made...but that would mean waiting a day for the glue (Gorilla) to cure before I could get back to work. So I'm gonna go grind the bolt down a little and see if that does the trick.

11 September 2006

It's Been a While

Yup...been a while since I've posted here.

I've been busy working...just haven't been taking my camera with me to get pictures of the various jobs I've been doing.

However, today I am starting a new task here at home and I have my camera handy.


About a year ago I bought a, "Floor Machine" an all purpose buffer/polisher/sander.
Unfortunately, when I bought it it didn't come with a pad holder and the switch was broken so it wouldn't turn off as long as it was plugged in. For the past year I've been talking about fixing the machine and re-finishing the bedroom floors in my house. I borrowed a machine a couple of years ago and did the livingroom floor, not too difficult a process...just a lot of hard work and sweattin involved.

So about a week ago I finally started working on my machine. The first step was to make myself a pad holder...the part that attaches to the bottom of the machine and holds the sandpaper on. I saw one on Ebay that was $160 but knew I could make most of it myself. Fortunately for me the place that was selling the holder was also selling the 'clutch plates' the part that directly attaches to the machine...the only part I knew I couldn't make myself. So for $25 I got six of them and went to work on the rest.


That's the pad holder on the bottom of the machine.

Here's the new switch I put on. The old one worked when you held the handles in...that one was obsolete and irreplaceable so I ended up just getting a toggle switch I mounted by drilling a hole through the housing and bolting it on.


So now I'm off to sand.

Did I mention I only paid $20 for it? :o)