28 November 2005

I've got that Sinking feeling once again


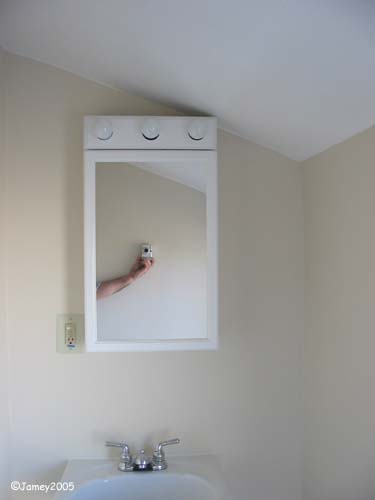
Here's the business end of the new pedestal sink.
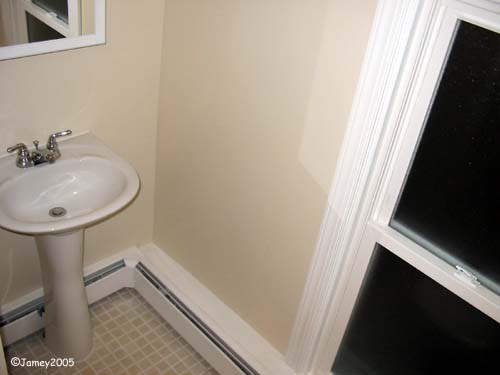
The old sink was similar but was just a wall-hanger, no pedestal. I thought the pedestal sink would be a better idea because it would hide all of the pipes and stuff because as you can see in some of the other pictures on older posts, all of the plumbing comes up from the floor. That was the first problem with what I bought...the 'Pedestal in a Box' comes with plumbing parts made to go into the wall, not the floor. So the supply lines it came with were too short and I had to get new ones, and it came with a 'P-Trap' and I needed an 'S-Trap' for my setup. (Lets not even talk about the fact that it also came with a faucet and I bought one like 5 months ago when I was trying to, "Have all of the pieces of the puzzle before you begin" as Dan always says).

It seems to me like the clay gets really thin near the attachment points (the metal plate hanger and the two screws at the bottom). The old sink attached pretty much the same but I think it was much thicker where the weight is being carried, it didn't have a pedestal though. Lets just say that with the whole room pitched to one side and the 100 year old wall...the lining up of everything so that the sinks weight is being carried by the pedestal AND the wall was extremely difficult. I ended up with a little gap between them when I screwed it tight to the wall. I figured this was probably kindof a good thing though since the 'Toilet in a Box' made a point about porcelain cracking when it contacts other porcelain telling the installer not to crank the tank down to the bowl too tightly so I felt the gap filled with my adhesive caulk to act as both glue and gasket would be the best way to go anyway. So I filled the gap with Phenoseal...and worked it back up and in as it sagged down for a few days while the thicker spots cured. I also ended up with a gap at the top of the sink because of the wall which took a few rounds of caulk to seal up.
Overall it looks pretty good and everything works. I hope it lasts.

25 November 2005

Mirror Mirror on the Wall...


One of the last projects in the bathroom was putting up the new vanity. I decided to go with one that I think is a little nicer than what was in there before.
Unfortunately...I didn't think it all the way through before I put it in and hooked it up.
The first problem is that this one is taller than the other one was which unfortunately meant the electrical box I put in the wall where the old wires had just been hanging out of the wall was now too low. Fortunately I left myself enough wire so that I could run it out of the box and up the wall to the top of the cabinet where the wires for the lights are.
The next problem became apparent when I turned the power back on. The old cabinet had a switch for it's lights, this one does not. And naturally when I re-did the wiring in the bathroom I made it so that the outlet and vanity were always hot and not controlled by the main switch. I had already put my second GFI outlet in the wall there because the first one was cheap junk and it burned out so I bought a better one when I was at Lowe's.
So I went to my local electric supply house and talked to them about switch possibilities and worked my way up from one that was a dollar to one that was $13 to what I ended up with which is the GFI/switch combo you see here for $26. I was pissed that it was that much but when I looked at them at the big stores they were only $23 so I went from feeling ripped off to being happy that I supported my local little guy and not the big national chain stores on that one.

So now it's all hooked up and done and it looks pretty darn good.

17 November 2005

Sinking (the) Dormer


I don't think I mentioned it before...but as this is a third floor apartment in a 100 year old house one of the little oddities is that the sink and toilet end of the bathroom are actually built into a dormer.

I guess the previous owners who are the ones that converted the third floor into an apartment thought two windows was a bit too much for such a small bathroom so they enclosed one (poorly) inside a wall and put in a vinyl replacement for the other in 1973. As you saw in yesterdays post it's a really stupid design because the toilet sits right in the window. What I would have liked to have done what with tearing it all out and re-building it (the Wall-to-Window posts from September) would have been to put in a half height but double-width window at the top of the wall...but unfortunately the outside of the house is stucco (probably also done in '73) and I wasn't going to start messing with breaking out and replacing the stucco 3 stories above the sidewalk. Not to mention trying to match colors with 30+ year old stucco which I did a LOUSY job of when I was patching down at ground level.


Anyway...Here's the pedestal sink and the heater is all put back together and attached to the new window sill and support structure I built. I used Cedar thinking it's in a bathroom and that's what the rest of the house is made of...went to a small lumber yard and got hosed, cost me $45 for 2 pieces of Cedar like 1"x6"6'

I don't like pedestal sinks anymore. Maybe I don't get the concept...maybe I need to put in a few more. But it seems to me like it is very hard to get everything lined up right so all the weight is where it should be. I still don't get what's really carrying the weight of the sink...or what will happen if it gets leaned on heavily. The clay seems thin where the 2 bolts and even the hanger plate attach the sink to the wall...and the base isn't a great support with the floor (the house) not being level but the sink is level on the wall. There is a heavy bead of caulk between the sink and the pedestal and another one between the pedestal and the floor. I figure my caulk is an adhesive so once it dries everything will be glued together nicely and it should hold up for a long time. What I'm saying also is that it took a lot more caulk than I think it should have. No matter how much I played with the alignment (a good hour or maybe even 2 before I attached everything) there was just no way to get it so that the back of the sink would be flat against the wall and the bottom would rest flat on the pedestal with the pedestal flat on the floor.

So...maybe it's just me...but I didn't like the whole concept of the pedestal sink and I don't think I will be putting one in again (unless I have to)

Today I went to 84 Lumber and got the wood to make new kitchen drawers. Forgot the plywood, picked that up at Home Despot...had to go there because the 84 didn't have the new drawer glides I'll need. But I'll tell that whole story when I start with those pix (when I start the project).

16 November 2005

In The Shitter

After the last 'before' picture I thought this one seemed quite appropriate to do as the first 'after' shot of the bathroom. Those last pictures were taken at the beginning of June. This one was taken about an hour ago.

I still have a pretty long list of things I need to do in there, but if I stopped right now it's done enough to be a perfectly good bathroom for many years to come.

The only thing in this entire picture (the only thing in the room) that isn't new is the baseboard heater coil (which now has it's cover back on). Other than that...everything you can see and in most cases a few layers underneath is brand new and I put it all in on my own.
This is the largest undertaking I've tackled by myself. It's been one hell of a learning experience. Way different from being the Hundred Dollar a Day Guy or working hourly on someone elses job.

And just to avoid the mystery...yes.
The first thing I did once I got the toilet connected up was sit there for ten minutes and take it for a GOOD test run!! ;o)

15 November 2005

Before...

I was looking around and I found a bunch of 'before pictures' of the bathroom that I'm working on so I figured I'd just put them up today. I don't have time to write much, today's task is shutting off the water to the house and putting all the shutoffs on in the bathroom. This should be the last of the torch plumbing in the bathroom. Hopefully the last time I'll have to turn the water off and drain the system throughout the house, it's a pain in the butt.


Here's pretty much what I walked into in the bathroom when the girl that lived up there for the past 5 years moved out. The dropped ceiling was painted in place which was the only thing keeping the fibreglass pannels from falling down because they were holding so much of the crumbling plaster falling off above them. The walls were mostly wrecked and covered with so many layers of paint and wall-paper they were pretty much hopeless. The floor tile was so bad the edge of it fell off when I went to put up the new walls.


The old sink and the previous tenants lovely paint job. There was some tape and a few actual bandaids covering a crack on the underside of the sink.


The old tub and stuff. I put in the crappy shower liner after she broke the soap dish off the wall and didn't tell me. The only reason I found out was because my bathroom is below this one and my ceiling started leaking weird stuff for a few days before partially caving in over my shower.


This was her brilliant way of keeping the windows shut.


And this is what most of the old windows looked like when I went up there after she moved out.

10 November 2005

Finishing Up


Once the shims are all cut down I like to put a bead of caulk all the way around the window between the vinyl and wood frames. Just another layer to 'insulate' against the elements. The only caulk I ever really use is called Phenoseal. I'll put up a picture of the tube and talk about it in a future post. It's a vinyl adhesive caulk and like the label says it, "Does it All"


After the caulk around the window dried overnight I put back the stops that I talked about removing to get the window out, they are the first piece of wood you see here next to the vinyl frame. While I had them off I used a paint stripper to remove most of the layers of paint and old caulk from the stops. Once they were cleaned and sanded I put a coat of primer on them and let that dry. I numbered the pieces when I took them off so for the most part they went back where they came from. The only piece that didn't was a replacement piece from the top of one of the windows that looked funny because it wasn't the right size so I replaced that with the one I got out of the hidden window http://homerepairjournal.blogspot.com/2005/09/window-to-wall-2.html .
Once the stops were nailed in I filled the nail holes with putty and ran a bead of caulk along both edges (window and wall) of the stops. A coat of primer over everything sealed it all up and finished the job. All that's left now is a couple of finish coats when I go around and paint all the trim.

09 November 2005

Shims


Once all of the screws have been driven into the frame it's rather simple to remove the extra length of the shims. All you do is cut the shim with a razor knife as close to the vinyl window frame as you can without cutting it. Once you cut the shim you just snap it towards the cut and it will snap off level with the vinyl frame.

The same procedure is used for any shimming job. Doors, for example, are shimmed the same way.

One of the most important things, and I mentioned it in the previous post, is measuring everything to make sure you have it in square. Minor adjustments can be made with the screws and shims.

The easiest way to check for square is to measure from corner to corner. In the case of a window or door they are simple rectangles so the diagonal corner to corner measurements should be the same. If they are not the same, you no longer have a rectangle you have a parallelogram. Bad. Doors and windows don't look or work right if their frames are not square. Maybe most people would never notice...but if the side of a door I put in was rubbing the frame at the top and had more than a 1/4 inch gap at the bottom it would drive me nuts and I'd think about it every time I ever looked at the door.
So make sure everything's square.
You can use a carpenters square (a big metal L) to check as well...but measuring the diagonals corner to corner is easy.

08 November 2005

New Windows


I'm sure somewhere if I look I have a picture that shows the old (brown) windows. Maybe you can see one in a previous post, I'm not sure.
They were all messed up. A couple had broken glass...
The last tenant had screws thru a couple of the frames to hold them shut because the mechanisms were broken.
So I went out and spent a thousand bucks on windows.
Replacing them is fairly simple.
Pop the old one out...caulk...pop the new one in...shim it...and put the screws in.
That's where we're at here.

Ok...pop the old one out is one of the more time consuming parts of the job.
First you need to take a utility knife and cut the caulk all the way around the window and along the front of the stop. The 'stop' is the first wooden piece in the frame, one side touches the window the other side touches the frame.
Once you cut thru the caulk you will then have to remove the stops. Work them out carefully so that you don't break them or mar the rest of the window frame.
Cut any caulk holding the window in at this point.
Remove the (6) screws holding the (replacement) window frame to the wooden frame.
That's it...the window should then pop right out (pull on it from the top and tilt in)
The procedure is pretty much the same when doing original sash-type windows. You just remove the glass and the wooden strip in the middle that separates them, bash the metal wheel for the sash cord into the wall, and you're at the same point I am here.

Once the old window has been removed, clean away any caulk or loose paint around the frame.
Lay a bead of caulk along the outside stop (the piece on the outside that sticks out of the frame that the window rests on).

Carefully put the bottom of the new window into the opening and tilt the window into place. I guess this is where a helper would be good...but since I was doing it alone I drove a temporary screw in thru one of the mounting holes. With the window in place I cut my shims and put them in behind the screw holes in the frame. Be careful to not block the adjustment screw in the middle of the frame with the shim for the mounting screw right next to it. Drive the screws they supply thru the window frame, thru the shim and into the wall. Make sure the window is square as you tighten down the 6 mounting screws.

I bought Pella windows and I have a design complaint.
The top mounting hole is right where the metal wheel is on an old sash frame. I don't know a single contractor that doesn't just hammer the wheel flat so I'd say they should move their mounting hole an inch or two so it gets good purchase in the wooden frame. Needless to say, I made my own hole where the screw would hit wood.

04 November 2005

Onions, Ogres, and Tile...

Ok...so what do Onions, Ogres, and Tile have in common?

Layers Donkey. They all have layers!


I thought the tile deserved another look that goes more into the actual process.
From top to bottom what you are looking at is:
Cement Board
Thinset
Tile
Shims
Tub

The first step was putting up the new cement board walls around the tub. The old bathroom had plywood walls and I learned exactly why one of those old addagages in the business is, "Never use plywood in a bathroom!" At some point I'll backtrack the project here and show you the moldy plywood and rotted plaster that I tore out before I started. This project essentially began 2 years ago when the ceiling in my bathroom (below this one) caved in because the tennant had knocked the sopap dish off the wall and didn't tell me. The whole bathroom pretty much had been made of plywood. The problem with plywood is that it soaks up water like a sponge. So the wall and floor underlayment that the tile was glued to was expanding and contracting and growing mold ...Not good. Was going on here for 33 years before I got to it. So the new technology is to use this "Cement Board" product under the tile. It wont soak up the water and it doesn't expand and contract. When I was taught to put cement board in we did it using roofing nails. Every 4 inches on a floor and all along the studs for walls. Although I bought a couple of big boxes of roofing nails when I bought the cement board with the old boss one afternoon...I went back on my own and bought a box of the special screws they make for screwing down cement board. I ended up going back for a second box of them before all was said and done. And still probably used 2 pounds of the roofing nails.

After the cement board in the photo is the "Thinset Mortar" which is another cement based product that acts as the glue between the tile and the cement board. The old tile was litterally glued to the plywood using Mastic which is more of a plastic type glue than cement. I think the cement based product is less likely to be eaten by mold than the glue stuff was.

At the bottom the tile is resting on shims and not directly on the tub. That bottom area will be filled in with grout later. The cement board sits inside the tub lip but not directly on the tub either. As per the directions, the bottom 1/4 inch below the cement board was filled with caulk and allowed to cure before the tile was applied.

03 November 2005

Wall Tile

Once the floor was finished it was time to cover it up and start on the wall tile. I did the tub surround over a two day period. With something like 700 total tiles and the two flights of stairs in each direction to get to the wet-saw I decided to split the job in half.
The first day I did what you can (almost) see here, the larger tub wall. Mostly that one was a whole lot of field tiles and bending, not a whole lot of trips down to the saw. The only cut tiles were along the top and the edge you can't see in the photo.
On the first day I also put in the bull-nose tile you can see to the right of the tub. I used a 6x2 bullnose to run up the wall so that I wouldn't have to worry about lining up horizontal joints with the field tiles and also because there was pretty much exactly 2 inches of wall there next to the tub so they went right in. I did these on the first day so that they would be nice and straight and solid when I went back in the next day to do the field tiles.
There's also a huge dropcloth in the tub here to help prevent any chips or scratches if I drop a tile or have grit on my shoe or something when I'm working. It's a good idea to take the dropcloth out and shake it clean every day and shop-vac out the tub.
That's another "Carterism" as we who know the man that trained me call the things he says over and over again. In this case I'm referring to,
Sweep sweep...a thousand times sweep!
When we were working on a job in someone's home...we would completely clean the jobsite every night and stack all of our tools and stuff somewhere out of the way. It's a great way to work.
On this project, since it's an empty apartment in a house I own...I haven't really cleaned up once since I started. The fact that I'm planning on replacing almost every carpet and floor in the place probably has something to do with that...but I really should go thru and clean the heck outa the place just to keep the dust down now that it's getting colder out and I won't have the windows wide open 24/7 anymore.

01 November 2005

The Housebuilder's Bible

The Housebuilder's Bible Blog

A cool site I haven't had much time to read yet.

Grout


Grouting the tile is a pretty simple process.

After you let the tile 'set-up' overnight, wait for the cement used to glue them down to harden, the next step is to mix up another kind of cement (grout) to go in-between the tiles.
Yes...I know...Everybody already knows that. Yes...I've had too much coffee this morning and I'm typing faster than I'm thinking.
Anyway...
Grouting is simple. You put a blob of grout down on the floor and work it in using a tool called a 'Float.' It's there next to the bucket. Just a smooth rubber plate with a handle that you use to squish the grout down in-between the tiles.
Now here's where the guy that taught me this stuff and the directions on the bag differ. The directions say to wait 15-45 minutes and come back with a sponge to clean off the excess. My guru does the sponge wiping right after putting the grout in and then 15 minutes or so later when it hazes over going back with a towel and buffing off the haze.
Which one is right I think depends on the application to a certain extent...But I think I'm leaning more towards the directions than the training. The one thing I have learned since I've been out on my own is that there are a lot of things I was taught that were things to make a job go faster and not necessarily better.
We'll have to re-visit this topic after I do a few more tile jobs and really start to see which way is best.

The one thing I will say though is be sure what level you want your grout to be at on the tile and make it consistent throughout for the most professional looking job.