

Installing the Drawers
Today's post will be short and to the point as I am 3/4 of the way through putting in the new kitchen floor and I'd like to get it done today.
So with the boxes all made (the ends were sanded smooth after the glue dried and I knocked down all the edges (which just means I went around all of the corners and sharp edges with a piece of sandpaper and rounded them over...you can actually cut yourself on a really clean wood edge, and I think they are less likely to splinter if you smooth them off a bit.)) it's time to put in the new drawers.
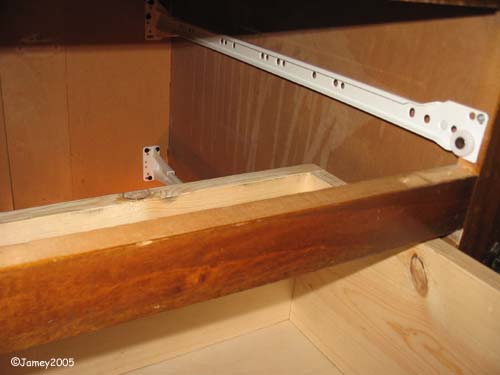
The new 'European style' drawer glides are pretty simple to install. There are 2 pieces on each side, one gets screwed to the bottom of the drawer and one gets mounted to the cabinet. One screw on the front is all you need to attach the glide

The back of the glide is easily attached to the cabinet using a 'Shoe' (not included but only a buck extra). You simply put the back end of the glide into the plastic shoe and then making sure the glide is straight and level you put a couple of screws in the back of the cabinet to hold the shoe in place. There are slotted holes on it so that you can make some adjustments once you get the screws in and then I put a few in the round holes to lock it in place.
As far as mounting the drawer, that's it...you're done. The glides should fit nicely together and the drawers should move in and out without catching (like they can on the little screws that hold the glides to the bottom of the drawer if they aren't in tight).
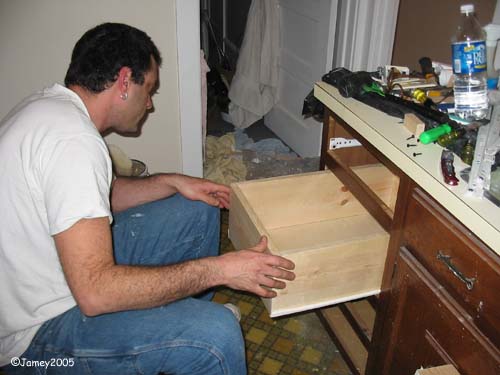
The final step is to mount the drawer fronts on the new boxes.
I hold the drawer front in place and poke through the holes using an awl (a screw or a nail will work) marking where I need to drill into the new box. A couple of small holes are drilled in the drawer and the screws hold the handle on and the drawer face in place.
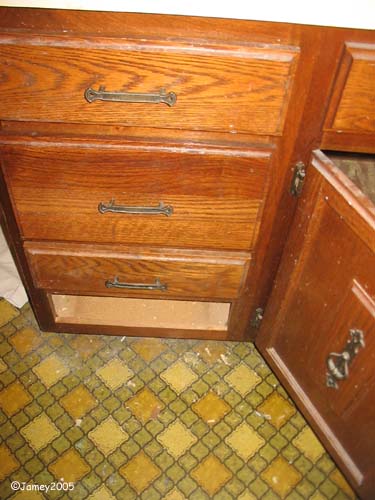
Done.
(and you can clearly see why I'm replacing the kitchen floor)
posted by Jamey @ 2:20 PM
![]()
0 Comments:
Post a Comment
<< Home